Design EDDM artwork the post office will actually accept
Bleed, safe zones, the mailing panel, indicia placement, and PDF export settings — the rules that keep your job from getting rejected at drop-off.
This page is for designers and DIY business owners setting up Every Door Direct Mail (EDDM) artwork. By the end you'll know how to set bleed and safe zones, what belongs on the mailing panel, how to export a print-ready PDF, and the mistakes that send files back for revisions.
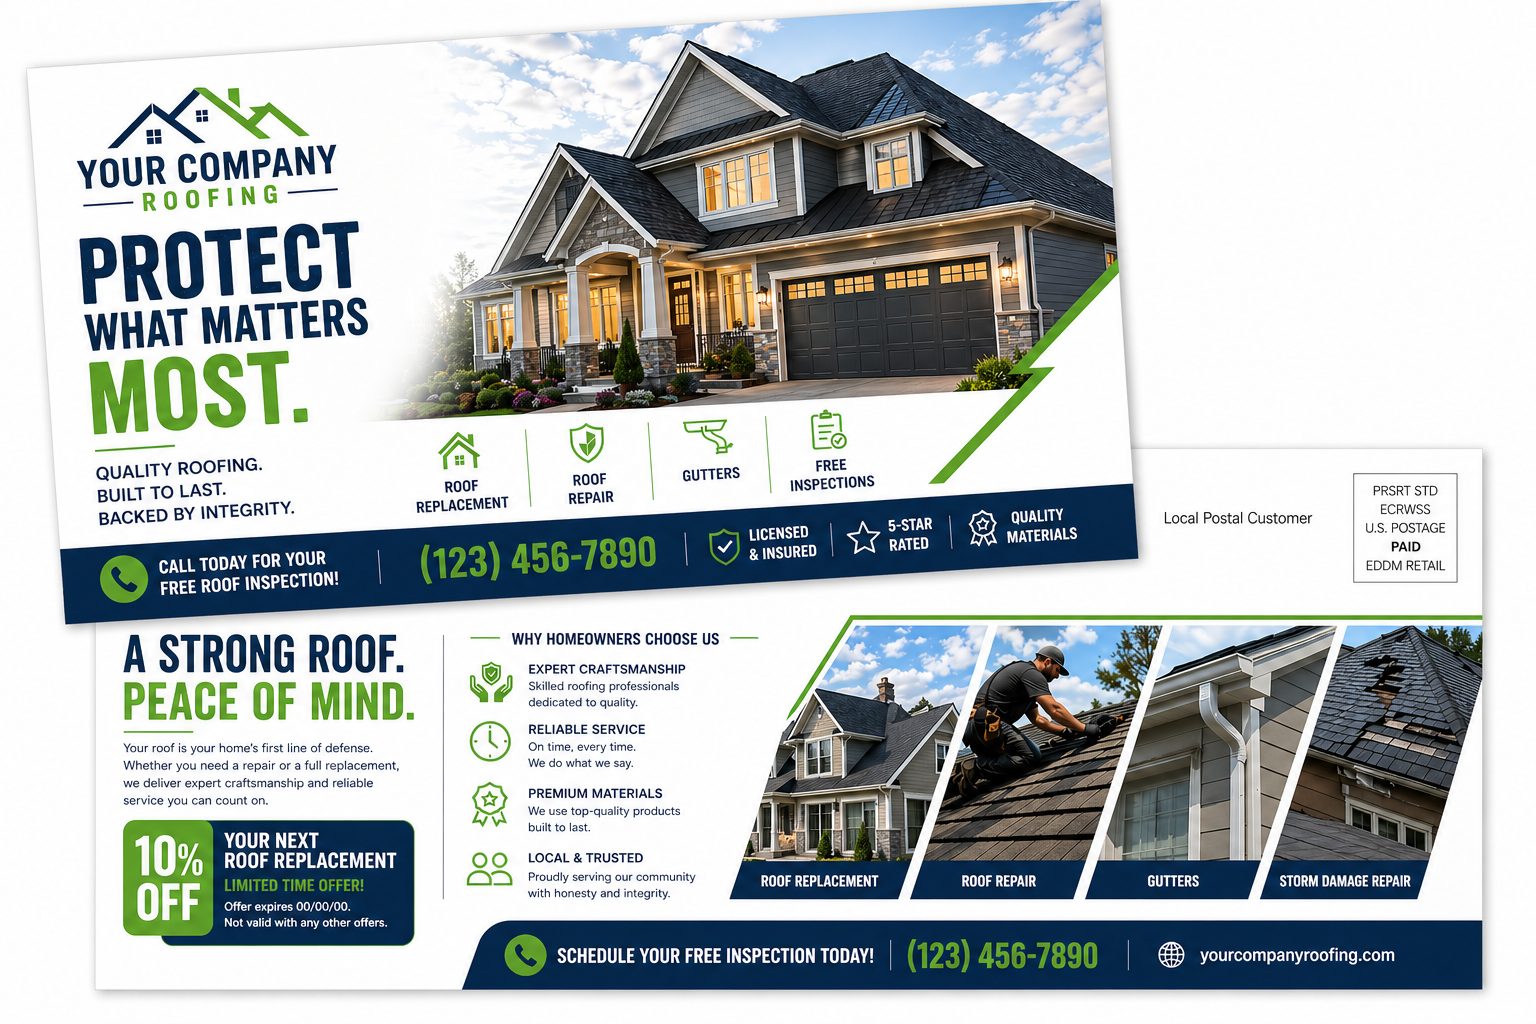
The short answer: what makes EDDM artwork different
An EDDM piece is a postcard with one side reserved for the post office. On a regular postcard you can design both sides freely. On EDDM, one side becomes the mailing panel — it holds the indicia (the printed block that replaces a stamp) and the "Local Postal Customer" line, and it has to leave room for the carrier to read it. Both sides still need proper bleed, trim, and safe zones, because USPS rejects mail with the indicia obscured, the address area cluttered, or critical content cut off at the edge.
If you've designed a 6.5" x 9" postcard before, the only structural changes are: reserve the mailing panel area, drop in the EDDM Retail indicia in the upper right, and skip the individual address — EDDM mails to every door on a route, not named recipients.
The two sides of an EDDM piece
Every EDDM mailpiece has a design side and a mailing panel side. The design side is your offer, headline, photo, and call to action. The mailing panel side is split: roughly the right third is reserved for USPS (indicia, return address, "Local Postal Customer" line), and the left two-thirds is yours for a secondary offer, a map, a coupon, or supporting copy.
The design side has no USPS-mandated zones beyond bleed and safe area. The mailing panel side is the one that trips people up, so plan it first and design the other side second.
Bleed, trim, and safe zone
Set your artwork up with the dimensions below. These are the standard print specs we use across EDDM postcard sizes, and they match what our prepress team checks before sending a job to press.
| Spec | Dimension | What it means |
|---|---|---|
| Bleed | 0.125" (1/8") on all four sides | Background color or imagery extends past the trim line by this much, so trim variance doesn't leave white slivers. |
| Trim | Final piece size (e.g. 6.5" x 9") | The line the cutter aims for. Real-world trim can drift ±0.0625" in either direction. |
| Safe zone | 0.125" to 0.25" inside trim | Keep all text, logos, and anything you can't afford to lose at least this far in from the trim line. 0.25" is safer. |
A 6.5" x 9" EDDM postcard built correctly is a 6.75" x 9.25" document (trim plus bleed), with a live area around 6.0" x 8.5" where the important elements live.
Keep all important text and logos at least 0.25" inside the trim. USPS trim variance can clip artwork that sits too close to the edge.
The mailing panel
The mailing panel is the side USPS reads to route and deliver the piece. It holds three things: the EDDM Retail indicia in the upper right, the return address in the upper left, and the "Local Postal Customer" line in the middle-right address block. Everything else on that side is yours.
Reserve the upper-right corner for the indicia (about 1.5" wide by 1" tall is plenty). Reserve a horizontal address block of about 4" wide by 2" tall in the lower-right or middle-right. Leave that block clean — no patterns, no photos, no low-contrast art behind it. The carrier needs to read it at a glance and USPS scanners need a clear field. The left side of the panel can carry a coupon, a service-area map, hours, or social handles — just don't bleed into the address block.
Don't add an individual address block on EDDM pieces — they ship to "Local Postal Customer". Designing a name/address field is a common rejection cause.
EDDM indicia placement
The EDDM Retail indicia replaces a stamp and goes in the upper right corner of the mailing panel side, sized large enough to read (about 1.5" wide is typical). It's required on every mailpiece. The exact wording, font size, and border rules are specific enough that we cover them on their own page. For the full block — exact text, dimensions, and a copy-paste template — see our EDDM indicia and mailing panel guide. Set it up once, save it as a template, and reuse it on every EDDM job.
PDF export settings
Export each side as a separate single-page PDF. Use these settings:
- Color mode: CMYK only. Convert RGB images before export.
- Resolution: 300 DPI at final size. No upscaled 72 DPI web images.
- Fonts: embed all fonts, or outline them.
- Transparency: flatten before export. Drop shadows and blending modes shift unpredictably otherwise.
- Bleed: include 0.125" on all four sides.
- Crop marks: include trim marks, offset 0.125" so they don't print into the bleed.
- Pages: one PDF per side — front.pdf and back.pdf.
- Preset: PDF/X-1a:2001 or PDF/X-4 is ideal. "High Quality Print" works as a fallback.
Name files clearly — jobname-front.pdf and jobname-back.pdf — and label which side is the mailing panel so prepress doesn't have to guess.
Image resolution and color
Use 300 DPI at the final printed size, in CMYK. RGB files get converted at the press if you forget, and the conversion can shift colors — blues turning purple, greens going dull, near-blacks gaining a muddy cast. Convert in your design tool where you can preview the shift.
Phone photography is usually fine if shot at full resolution and not enlarged. A 4000-pixel-wide photo printed at 6" wide is comfortably over 300 DPI; the same photo printed at 14" wide will look soft. Check effective resolution in your layout tool's Links panel.
Black text on a light background should be 100% K (pure black), not built from CMYK — built blacks look fuzzy at small sizes. For large solid black areas, use a rich black build (around C60 M40 Y40 K100) so it looks deep instead of washed out.
Common EDDM artwork mistakes
- Adding an individual address block. EDDM uses "Local Postal Customer" — no recipient names. A name/address field will get the job flagged.
- Indicia in the wrong corner. It belongs in the upper right of the mailing panel. Anywhere else causes rejections.
- Artwork behind the address block. Patterns and photos behind the address area can fail scanner readability. Keep it clean and high-contrast.
- RGB files exported as RGB PDFs. Looks fine on screen, prints with shifted color. Always export CMYK.
- Text right at the trim line. Looks intentional in InDesign, gets clipped on press. Keep text 0.25" inside trim.
- Missing bleed. A background that stops at the trim line will show white slivers after cutting. Extend it the full 0.125" past trim.
- Choosing a size that doesn't qualify. A 4" x 6" or 5" x 7" postcard won't ship as EDDM Retail. See which postcard sizes qualify for EDDM before you start.
Free EDDM design templates
If you don't have artwork yet, the fastest start is one of our pre-sized templates. Each one is built to the correct trim size, with the bleed, safe zone, and mailing panel area already marked so you (or your designer) can drop in the offer and the indicia without measuring anything.
Templates available on request:
- 6.5" x 9" — Adobe Illustrator (.ai), PDF, and Canva
- 6.5" x 11" — Adobe Illustrator (.ai), PDF, and Canva
- 8.5" x 11" — Adobe Illustrator (.ai), PDF, and Canva
- 9" x 12" — Adobe Illustrator (.ai) and PDF
- 11" x 17" folded — half-fold and tri-fold variants, PDF only
Ask for the template that matches your size using the form below, or call (713) 300-0687. We send the file by email within one business day, with the EDDM Retail indicia block included so you don't have to set that up yourself.
Frequently asked questions
Can I design both sides in one PDF?
You can, but most printers prefer one PDF per side so there's no ambiguity about orientation. If you submit a single two-page PDF, label the pages: page 1 design side, page 2 mailing panel side.
What if I'm designing in Canva or another web tool?
Set your canvas to the final trim size plus 0.125" bleed on all sides, export as PDF for Print (CMYK if available), and check the file in Acrobat before sending. Web tools often default to RGB and 72 DPI — both fix-before-you-submit issues.
Do I need to leave space for a barcode?
Not for EDDM Retail. Barcodes are required for BMEU bulk mailings, but EDDM Retail uses the indicia in place of a barcode. Keep the address block clean and you're done.
Can I use a glossy or matte coating?
Yes — both work for EDDM. Gloss pops photos and color. Matte and soft-touch feel premium and reduce glare. If you plan to write on the piece, choose uncoated or matte.
Ready to set up your artwork?
Start by confirming your size on the EDDM size guidelines pillar page, then follow the indicia and mailing panel guide for the address side. When the file is ready, get pricing on the EDDM quote page, or call us at (713) 300-0687 and we'll walk through your design before you commit to a print run.